Sunday, January 6, 2008

Cozy Wristlets

I live in Minnesota, so when this time of year comes around, I like mittens and gloves. A lot. When temperatures are well below freezing outside, there's always a bit of a chill in the air inside, even when the heat's on. Unfortunately, mittens and gloves tend to get in the way of doing simple indoor tasks, like writing, or typing, or (of course) knitting. So I decided to make myself an alternative.

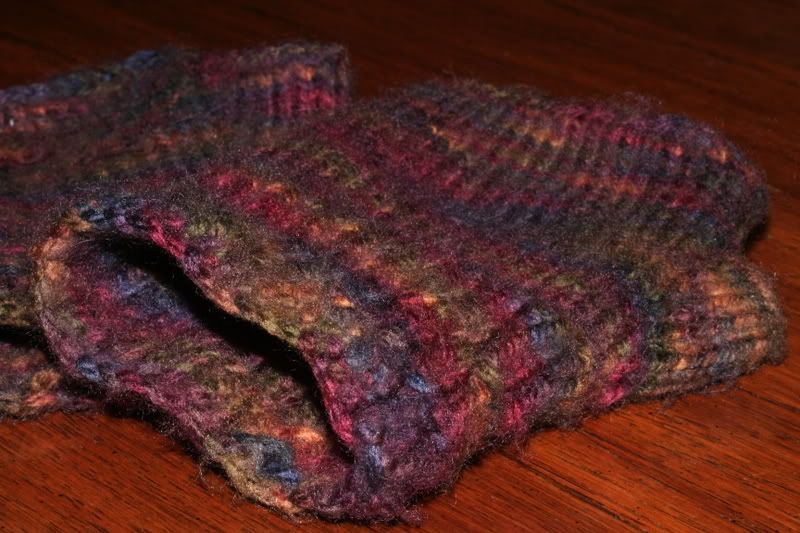
These wristlets (or fingerless mittens/wrist warmers/hand warmers/gauntlets/what have you) were based on a pattern for regular mittens that my mom had lying around. The mittens in the pattern were rather more complex than what I wanted to attempt—they included cables and needle switching and such—but they gave me something to start from.

I made these using a single strand of Lion Brand® Jiffy® El Paso on four US size 3 (3.25mm) double-pointed needles. To begin, I cast on 38 stitches and divided them on three needles (I did 13-12-13, you can switch it up a bit if you want, I suppose). I then joined the round and worked a knit 1/purl 1 rib for the cuff until the piece reached 2½ inches. Now, as you can see from the picture, my ribbing wasn't perfect. Somewhere along the line I ended up switching which stitches I was knitting and which ones I was purling, and later on I unintentionally switched back. It gave it an interesting effect, but that wasn't the original idea.

For the hands, the pattern went as follows:
Left Hand:
Rounds 1-3: Knit.
Round 4: Knit to within last three stitches, place knit marker. Purl and knit in first stitch, knit in front and back of second stitch (inc 2 stitches), place second marker (there should be four stitches between markers). Knit.
Rounds 5&6: Knit.
Round 7: Knit to first marker. Slip marker, purl and knit in first stitch, knit to within one stitch of second marker, knit and purl in front and back of stitch (inc 2 stitches), slip second marker (there should now be 6 stitches between markers). Knit.
Repeat pattern, increasing 2 stitches between markers every third round until you have 12 stitches between markers.
Next round: Knit to first marker. Remove marker. Place next 12 stitches on stitch holder. Remove second marker. Cast on two stitches over thumb hole. Knit.
Work remaining rounds in stockinette stitch to desired length (in my case, about to my knuckles). Bind off.
Move 12 stitches for thumb hole from stitch holder to one needle. Bind off.

Right Hand:
Rounds 1-3: Knit.
Round 4: Knit to within last three stitches. Place marker. Knit in front and back of first stitch, purl and knit in second stitch, place second marker. Knit.
Rounds 5&6: Knit.
Round 7: Knit to first marker. Slip marker, knit in front and back of first stitch, knit to within one stitch of second marker, purl and knit in stitch, slip marker. Knit.
Repeat pattern, increasing 2 stitches between markers every third round until you have 12 stitches between markers.
Next round: Knit to first marker. Remove marker. Place next 12 stitches on stitch holder. Remove second marker. Cast on two stitches over thumb hole. Knit.
Finish in the same pattern as for the left hand.

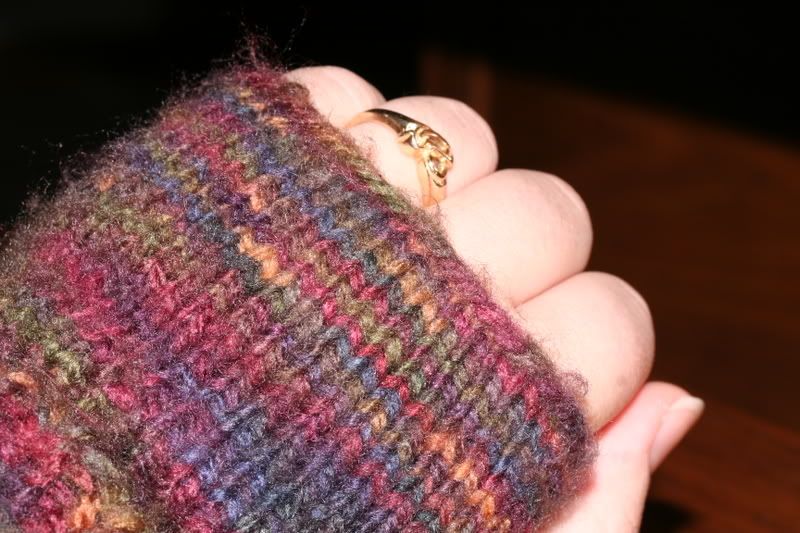
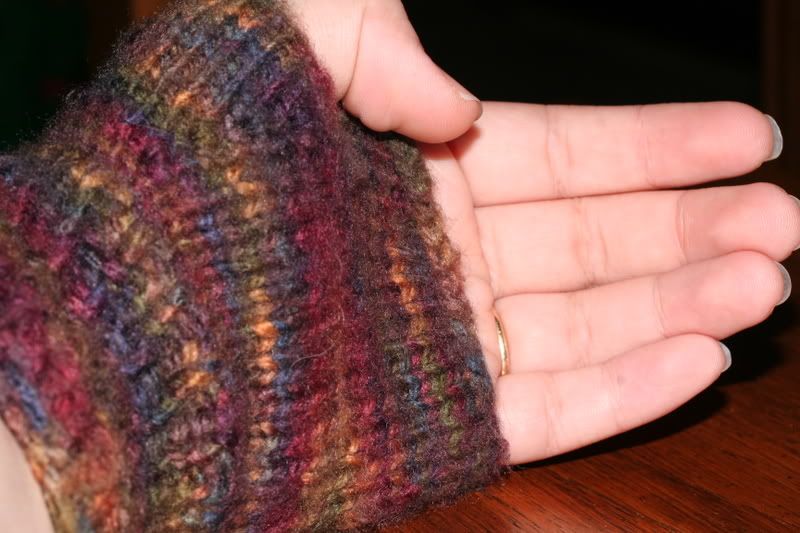
The finished product is incredibly comfortable, and it keeps my hands warm while leaving my fingers free to type this blog or work on my next project!

Friday, January 4, 2008

Some Variations on an iPod Case

I got an iPod for Christmas. I was looking for a case for it, and I couldn't believe how expensive they were! In my search, I ran across the "iPod Sock," and I thought, "Wait a minute . . . I could make that!"

For my iPod sock, I raided my bag of scrap yarn. I had some leftovers of the Caron® Simply Soft® Tweed from my hat, as well as some Simply Soft® Heather, some Lion Brand® Homespun®, and a thin, variegated bouclĂ©. I played around with a few different sizes until I found something I liked. I had my iPod out so that I could sort of custom fit it. In the end, this is what I came up with:

Using four strands of yarn on US size 11 (8mm) straight needles, cast on six stitches.
Knit 2, purl 2, knit 2 each row to desired length, bind off.
Fold, leaving a flap at the top.
Using a single strand of yarn, whip-stitch each of the long sides.
Sew a large button to the front of the case and tie a loop of yarn to the underside of the flap for a closure.

I also created a pouch on the back to hold the earbuds. Using the same yarn and needles, I cast on four stitches to make a square roughly 1½ in. by 1½ in., and sewed that to the back of the case using a single strand of yarn. It's a bit of a tight fit; I think if I did it again I would make it the full width of the case. Snug or not, though, it definitely works.

When this first experiment was a success, I decided to try something a little bit different. I had a case for transporting my iPod, but what about a case that would allow me to access the controls and see the screen?

This turned out to be a little more difficult than I had expected. I used one strand of Lion Brand® Homespun® Nouveau and one strand of Lion Brand® Jiffy® El Paso on US size 8 (5mm) straight needles. I actually made this one in seven pieces:
  1. Back
  2. Left Side
  3. Right Side
  4. Bottom Strip
  5. Middle Strip
  6. Top Strip
  7. Strap/Closure
This was definitely a trail-and-error process, and I didn't keep track of any sort of pattern that I could give you. I basically kept my iPod handy so that I could figure out the sizes of each piece, and then used the Jiffy® yarn to sew it all together. I did the closure a little differently on this one: I sewed the button to the strap and tied the loop to the back of the case.

These two cases ended up working pretty well for my iPod Classic. This is definitely something that all of you knitting iPod owners can do! I mean, after all, why spend $20+ on a case when you probably have all the supplies that you need at home?

My Favorite Hat

Over the course of the past several years I've made maybe half a dozen hats, and all of them have been variations on a very simple pattern. My favorite of the three that I've kept for myself, however, is a pattern that I will probably repeat. It's a simple ribbed "beanie" style hat. This is definitely a pattern that you can play around with; experiment with different needles and yarns and figure out what you like best.

For my hat, I used two strands of Caron® Simply Soft® Tweed (I used black, but they have several other fun colors) on US size 9 (5.5mm) straight needles.

Like I said, this pattern is incredibly simple. You're essentially making a cylinder and then pulling the top together. For this hat, I cast on 34 stitches. I then worked a simple pattern:

Rows 1 and 2: Knit
Rows 3 and 4: Knit 2, purl 30, knit 2

I repeated this pattern until the hat was long enough to wrap around my head. I made it a little on the snug side to allow for stretching over time. Once the hat was long enough, I bound off all the stitches, leaving a nice long tail. To finish, I wove the tail in and out through one of the long sides, pulled it tight, and then whip-stitched the short sides together. If it's easier to keep things lined up, you can stitch the short sides together first and then pull the top tight.

The hat is long enough that I usually fold up a brim that's about an inch high. However, it also works well folded down over my ears on those particularly chilly winter days here in Minnesota!